# Details of C&I Plant
Details of a C&I plant are presented in the form of menu. It includes Data overview, System overview, Alarm information, System settings, and Plant information.
# Data overview
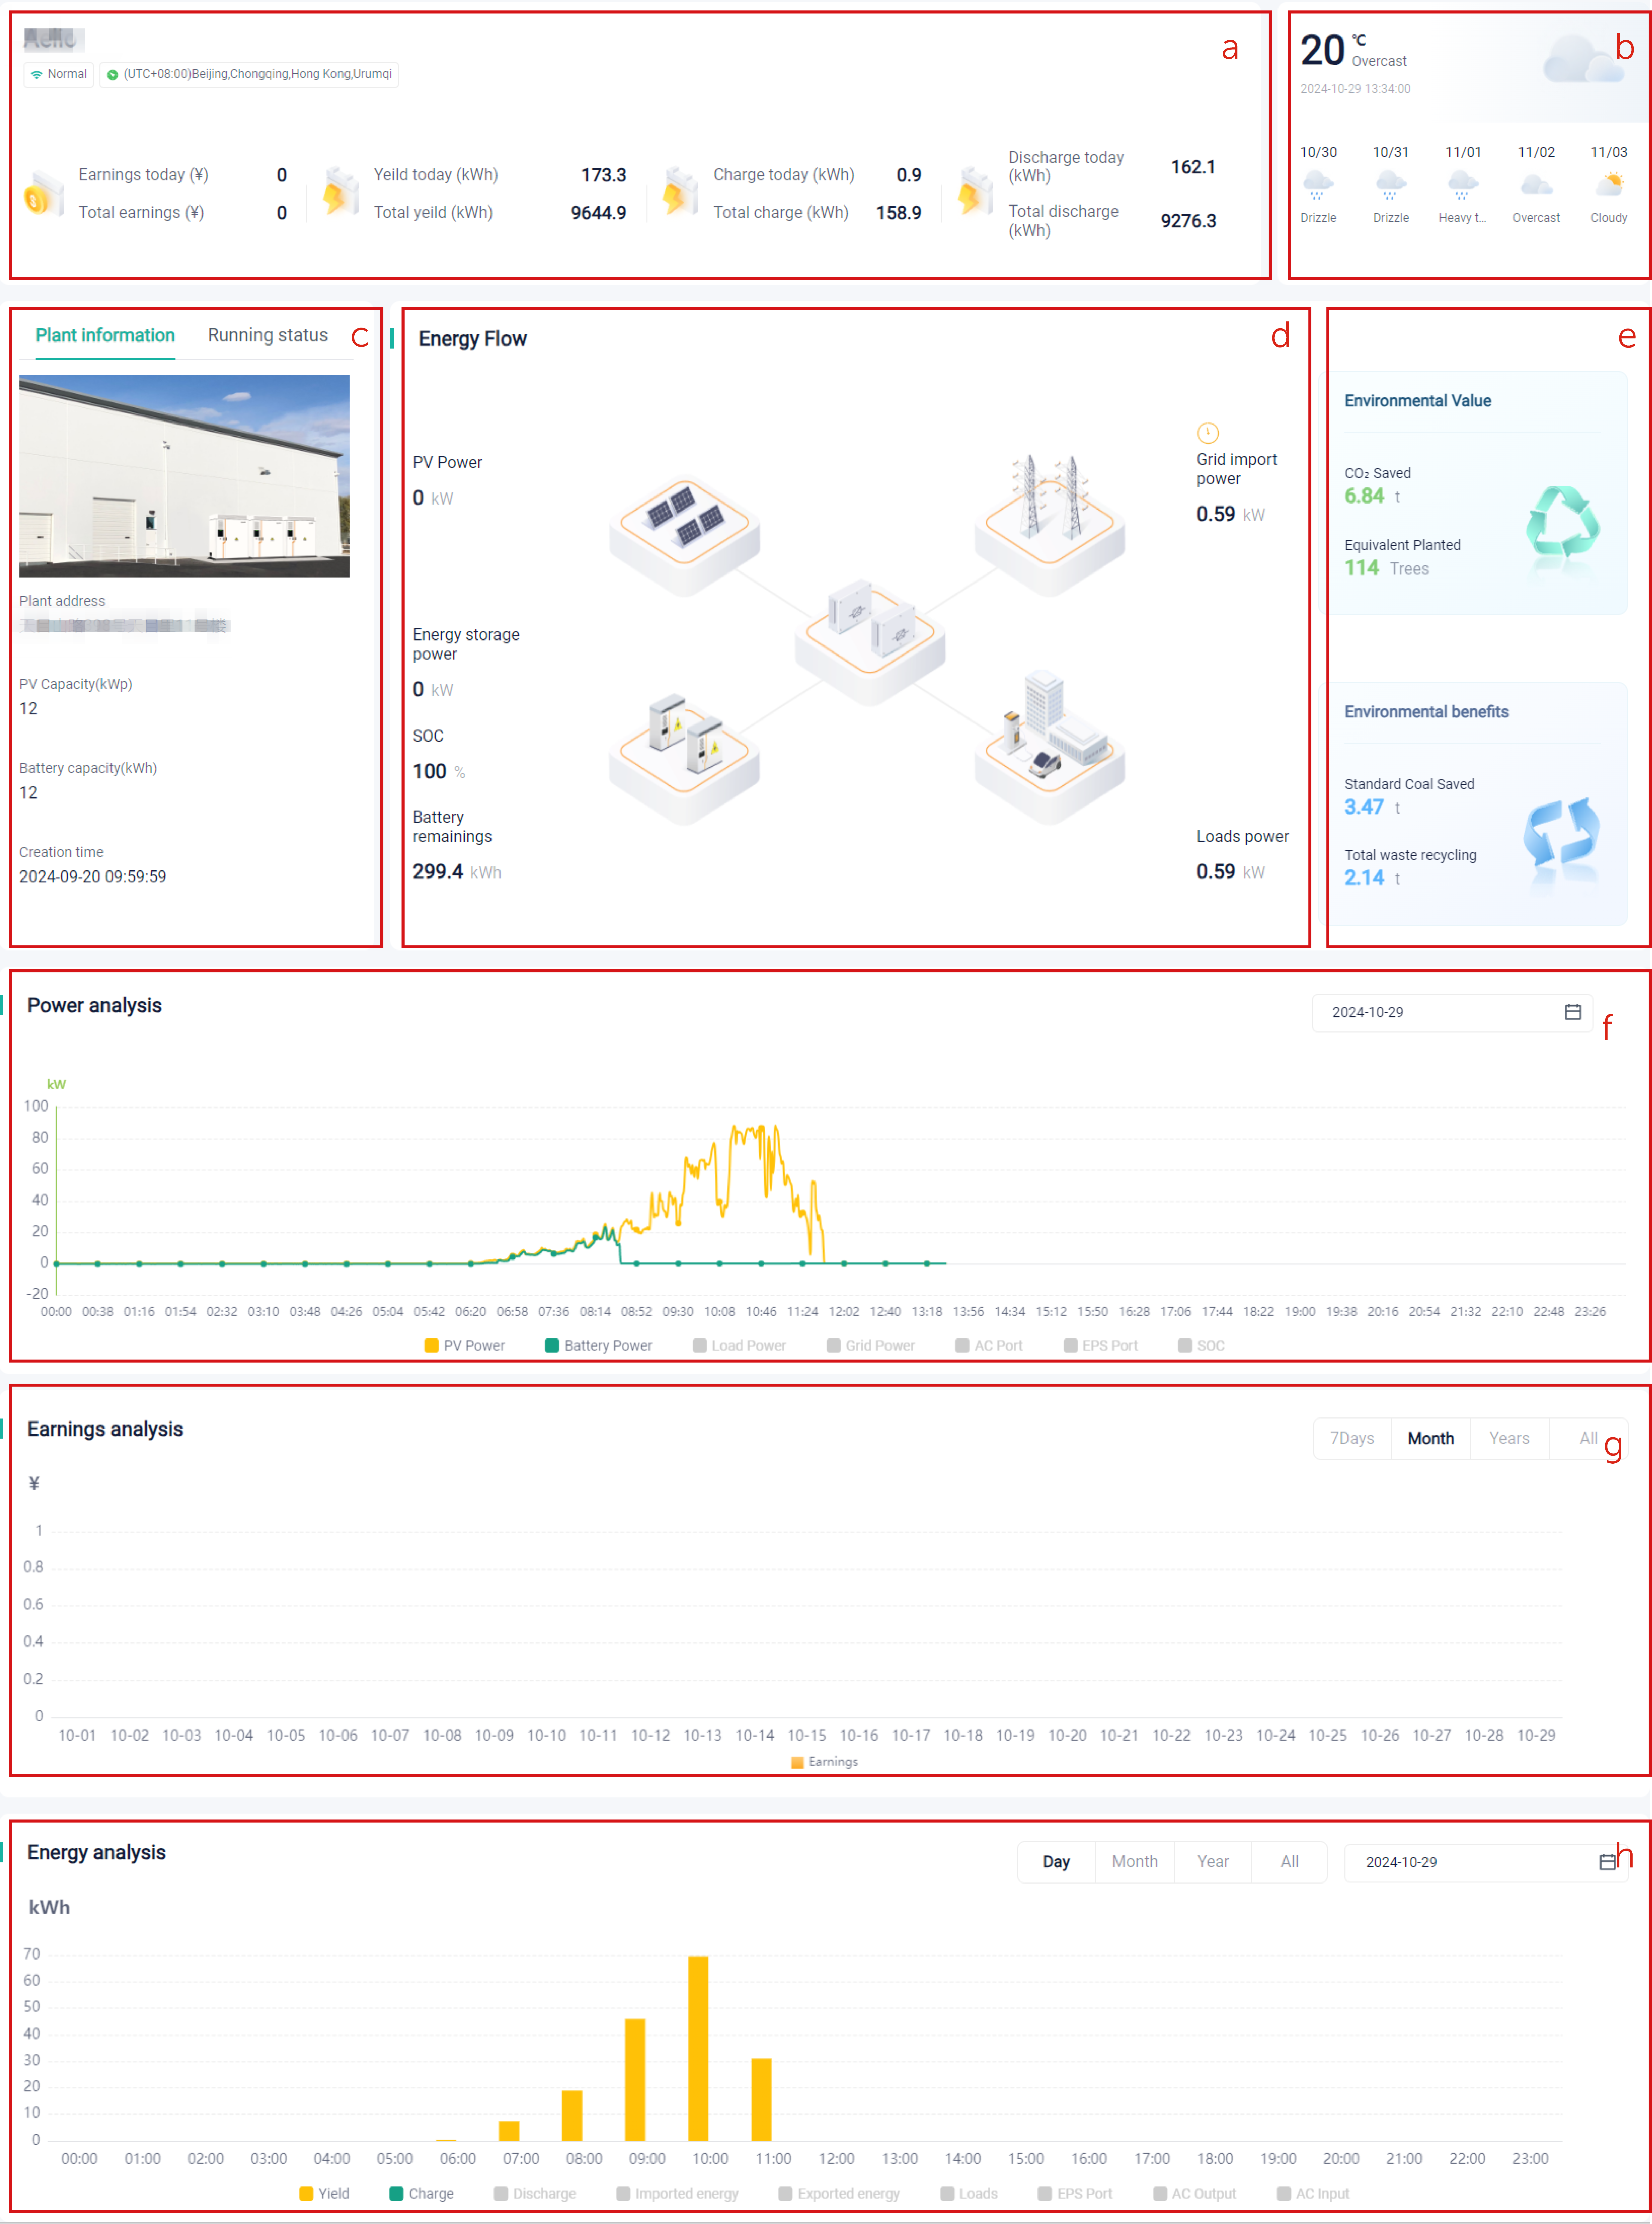
The page below displays data of plant, to help you learn about the performance of plant.

The following table introduces composition of the data overview page:
| SN | Description |
|---|---|
| a | This area displays plant name, plant status, time zone, earnings/PV yield/charge/discharge today, and earnings/PV yield/charge/discharge in total. |
| b | This area displays the weather today and in the next 5 days. |
| c | This area displays the plant information and running status of all devices under the plant. |
| d | This area displays the energy flowing among Grid, commercial loads, PV panels (if any), battery (if any), and inverter. |
| e | This area displays the equivalent environmental value and benefits brought by the green and clean power generation manner. |
| f | This area displays the trends of power and battery SOC in a specified time range. You can set the time dimension at the upper right corner of the trend chart. |
| g | This area displays the trends of earnings in the last 7 days, this month, this year or since the plant has been created. |
| h | This area displays the PV power generation amount, the battery charge/discharge amount, the amount of power bought from/selling to grid and so on. |
# System overview
The system overview page helps you have a general understanding of a whole plant. Through the architecture on the left, you can know how many EMSs are in the plant and what devices constitutes an EMS.

Besides, when an EMS is online, you can perform the following operations on it:
Check: View the composition of an EMS by unfolding it. Clicking the EMS or other parts, you will see its details at the middle of the system overview page.
Add: Click Add device, to add an EMS through registration number.
Maintain: Click Maintenance to upgrade firmware, edit the device, restart the device, or set the device remotely.
Delete: At the bottom of the Device maintenance page, click Delete device.
# Alarm information
This page displays all warning messages, including current messages and historical messages. You can search for messages by alarm level, device type, or report time. Through the data in messages, such as device type, alarm name, and error code, you can locate and solve problems quickly.
# System settings
The following settings are all for inverters. Import control and export control are both used to control the power of inverter when it is connected to the grid.
# Work mode
You can set the work mode for an inverter. The work modes available now are self use mode, feed-in priority mode, backup mode, manual mode, peak-shaving mode, and TOU mode.
The below is general steps for setting work mode:
- Select a to-be-controlled device.
- Set a work mode for the device and then click Run.
- Set parameters for the work mode and save it.
Here describe the method for setting the TOU mode. For details about the other work modes, see the inverter user manual.
TOU mode
If you want to execute a TOU plan, follow the steps below:
Select a to-be-controlled device.
Select TOU and then click Run.
Configure the template.
Configure the strategy.
Click Execute, to run the mode.
For details about configuring the template and strategy, please see the following steps:
Configuring template

- Select Template configuration.
- Click +, to create a new template.
- Name the template and set the minus battery SOC. Divide one day (24h) into different time slots, and set a work mode for each time slot. The minimum time slot is 0.5h.
- Click Confirm, to complete template creation.
Configuring strategy

- Select Strategy configuration.
- Click +, to create a new strategy.
- Name the strategy, select the already created template, set the priority, set the cycle mode, and set the start and end dates.
- Click Confirm, to complete strategy setting.
[!Note]
- You can one priority for one template. The priorities of different templates cannot be the same.
- If selecting Repeat weekly, you need to set which days to recycle.
# Remote Settings
YOu can set an inverter remotely at the SolaXCloud with the authorization of a C&I user. The remote settings include user settings and advanced settings. For the setting method, refer to the corresponding user manual of the inverter.
# Import control
Set it as follows:
- Select an EMS to be controlled.
- Set a demand limit value.
- Turn Enable to be on.
- Click Save.

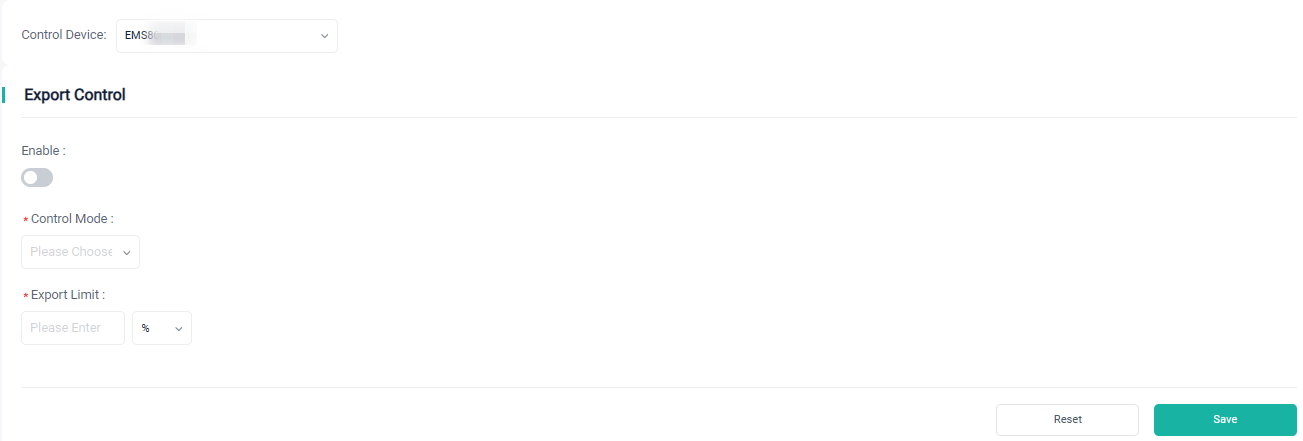
# Export control
Set it as follows:
- Select an EMS to be controlled.
- Select a control mode.
- Set an export limit value.
- Turn Enable to be on.
- Click Save.

# Plant information
This part displays the information about plant and electricity price. At the Elect information, you can view import and export prices. "Import" refers to users purchase electrical power from the grid. "Export" refers to users sell the surplus electrical power to the grid.
