
# Work Mode
According to the connection status with the grid, a device might be in grid-connected or grid-disconnected state. When it is grid-connected and online, you can set a work mode for it. Aelio system supports 6 work modes: Self-Use Mode, Feedin Priority Mode, Backup Mode, Manual Mode, Peak-shaving Mode, and TOU. Trene system only supports Self-Use Mode, Manual Mode, and TOU, but when a grid-connected photovoltaic inverter is integrated into the system, it also supports Feedin Priority Mode.
The following takes Aelio inverter as an example, to show you how to set the work mode.
# Self-Use Mode
Self-use mode is suitable for areas with high electricity consumption costs but low feed-in revenue. Its operation logic: The electricity generated by PV is preferentially used to meet the demands of C&I loads. After that, if there is still power left, it will be stored in the battery for backup. Only when the battery SOC reaches the target value can it be sold to the grid.
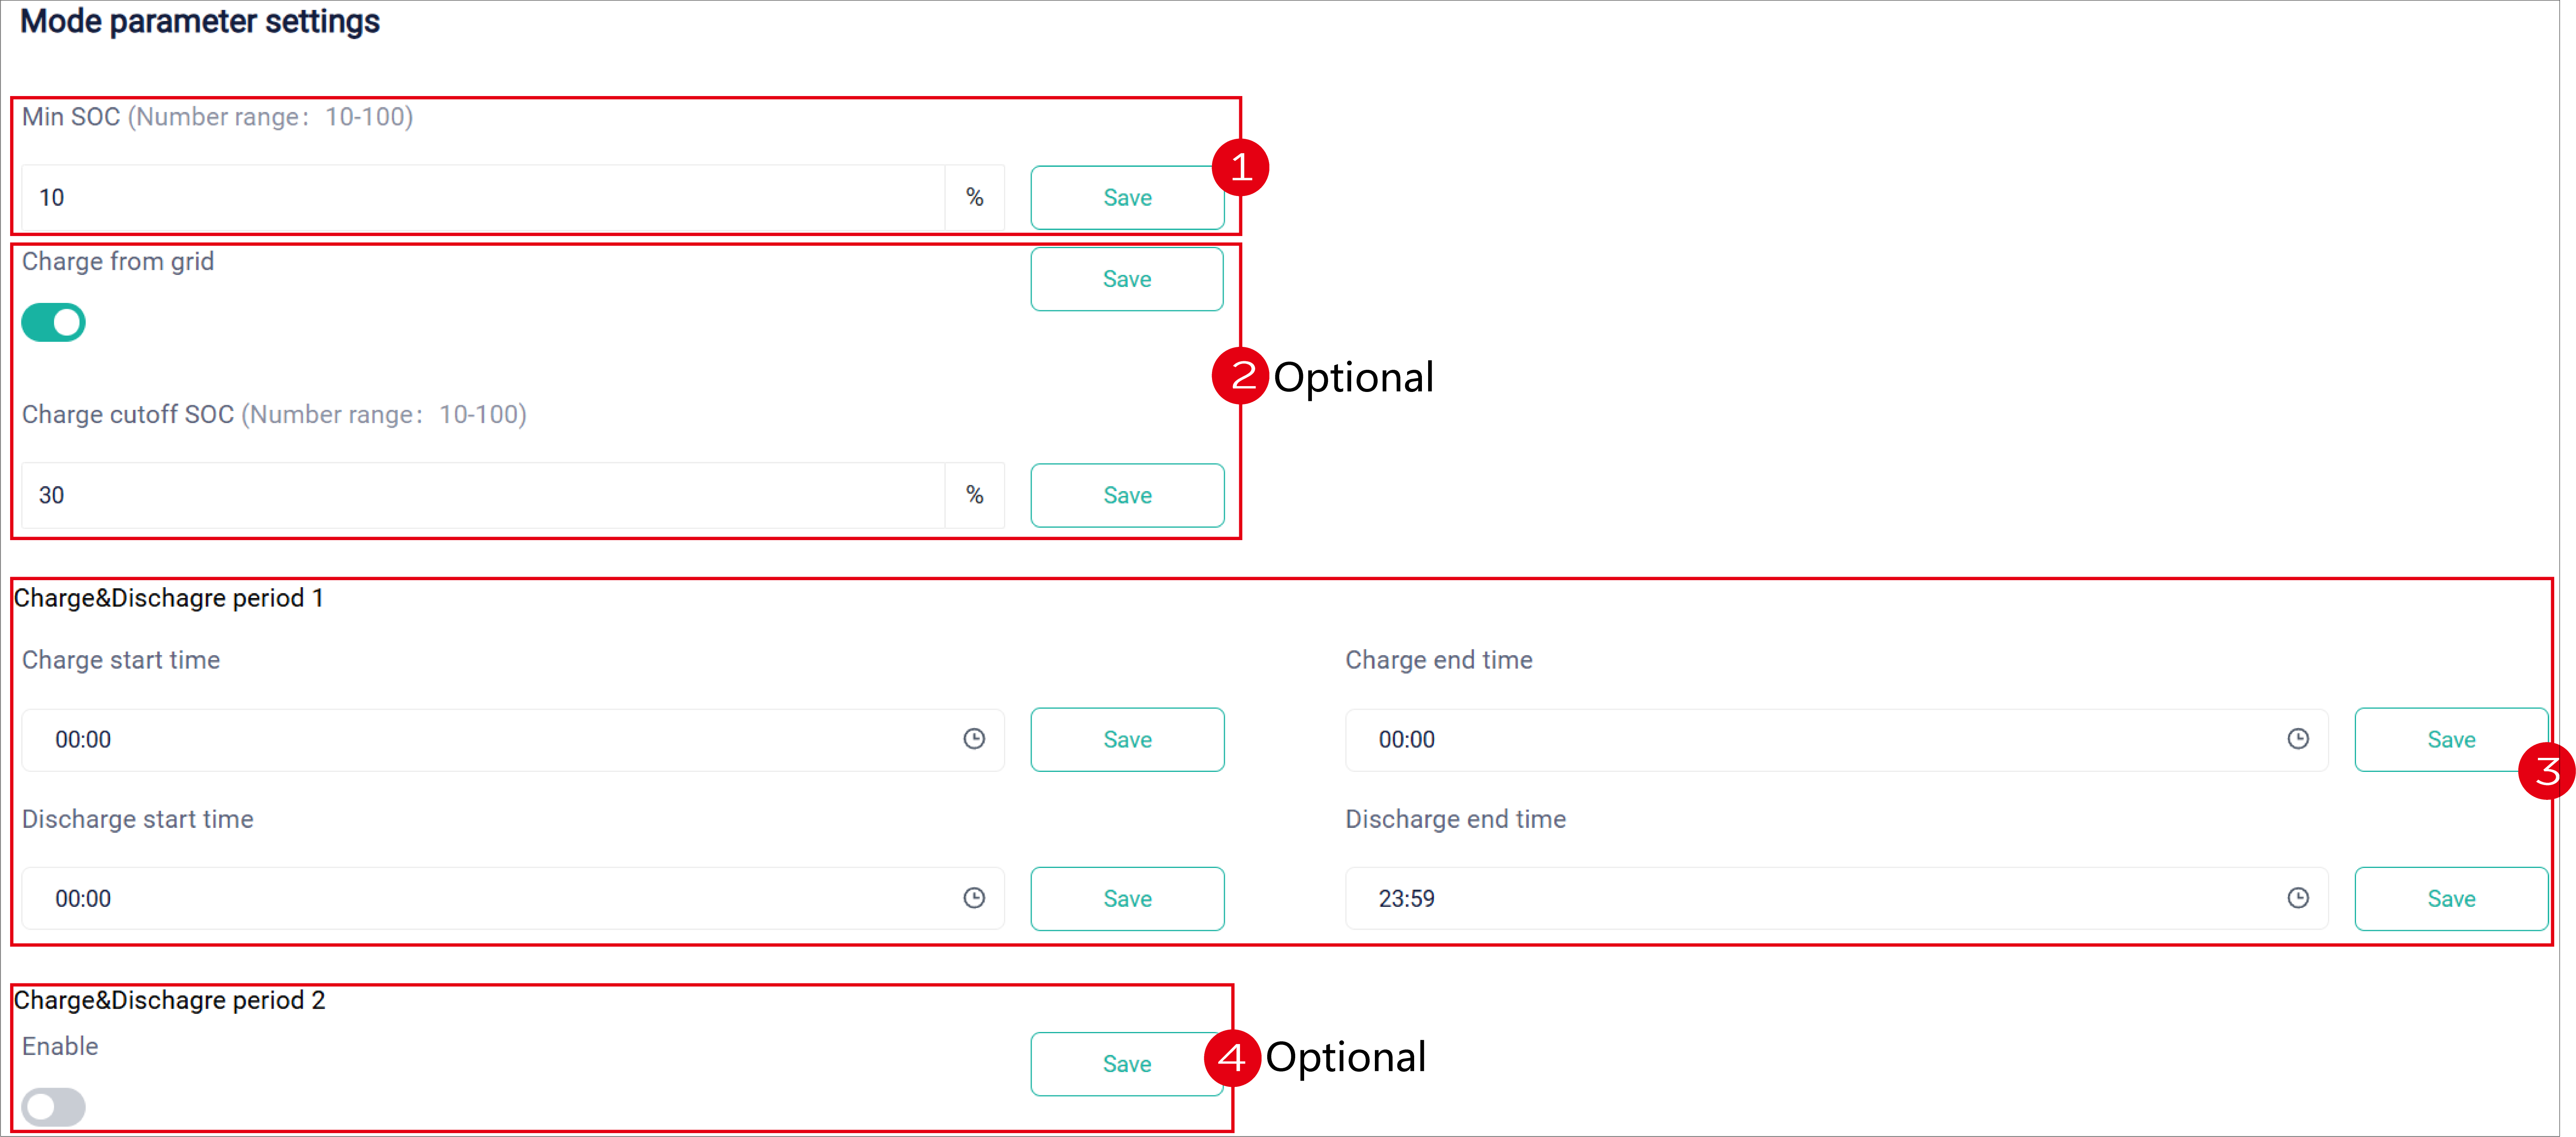
Method: Select the to-be-controlled device, select Self Use, and click Run. The following setting items will appear. Set as follows:
- Set the min SOC.
- (Optional) Set to take power from the grid and the target SOC.
- Set parameters for Charge&Discharge period 1.
- (Optional) Enable Charge&Discharge period 2 and set parameters for it.
# Feedin Priority Mode
Feedin priority mode is suitable for areas with high feed-in revenue. Its operation logic: The electricity generated by PV is preferentially used to meet the demands of C&I loads. After that, if there is still power left, it will be sold to the grid to gain profits.
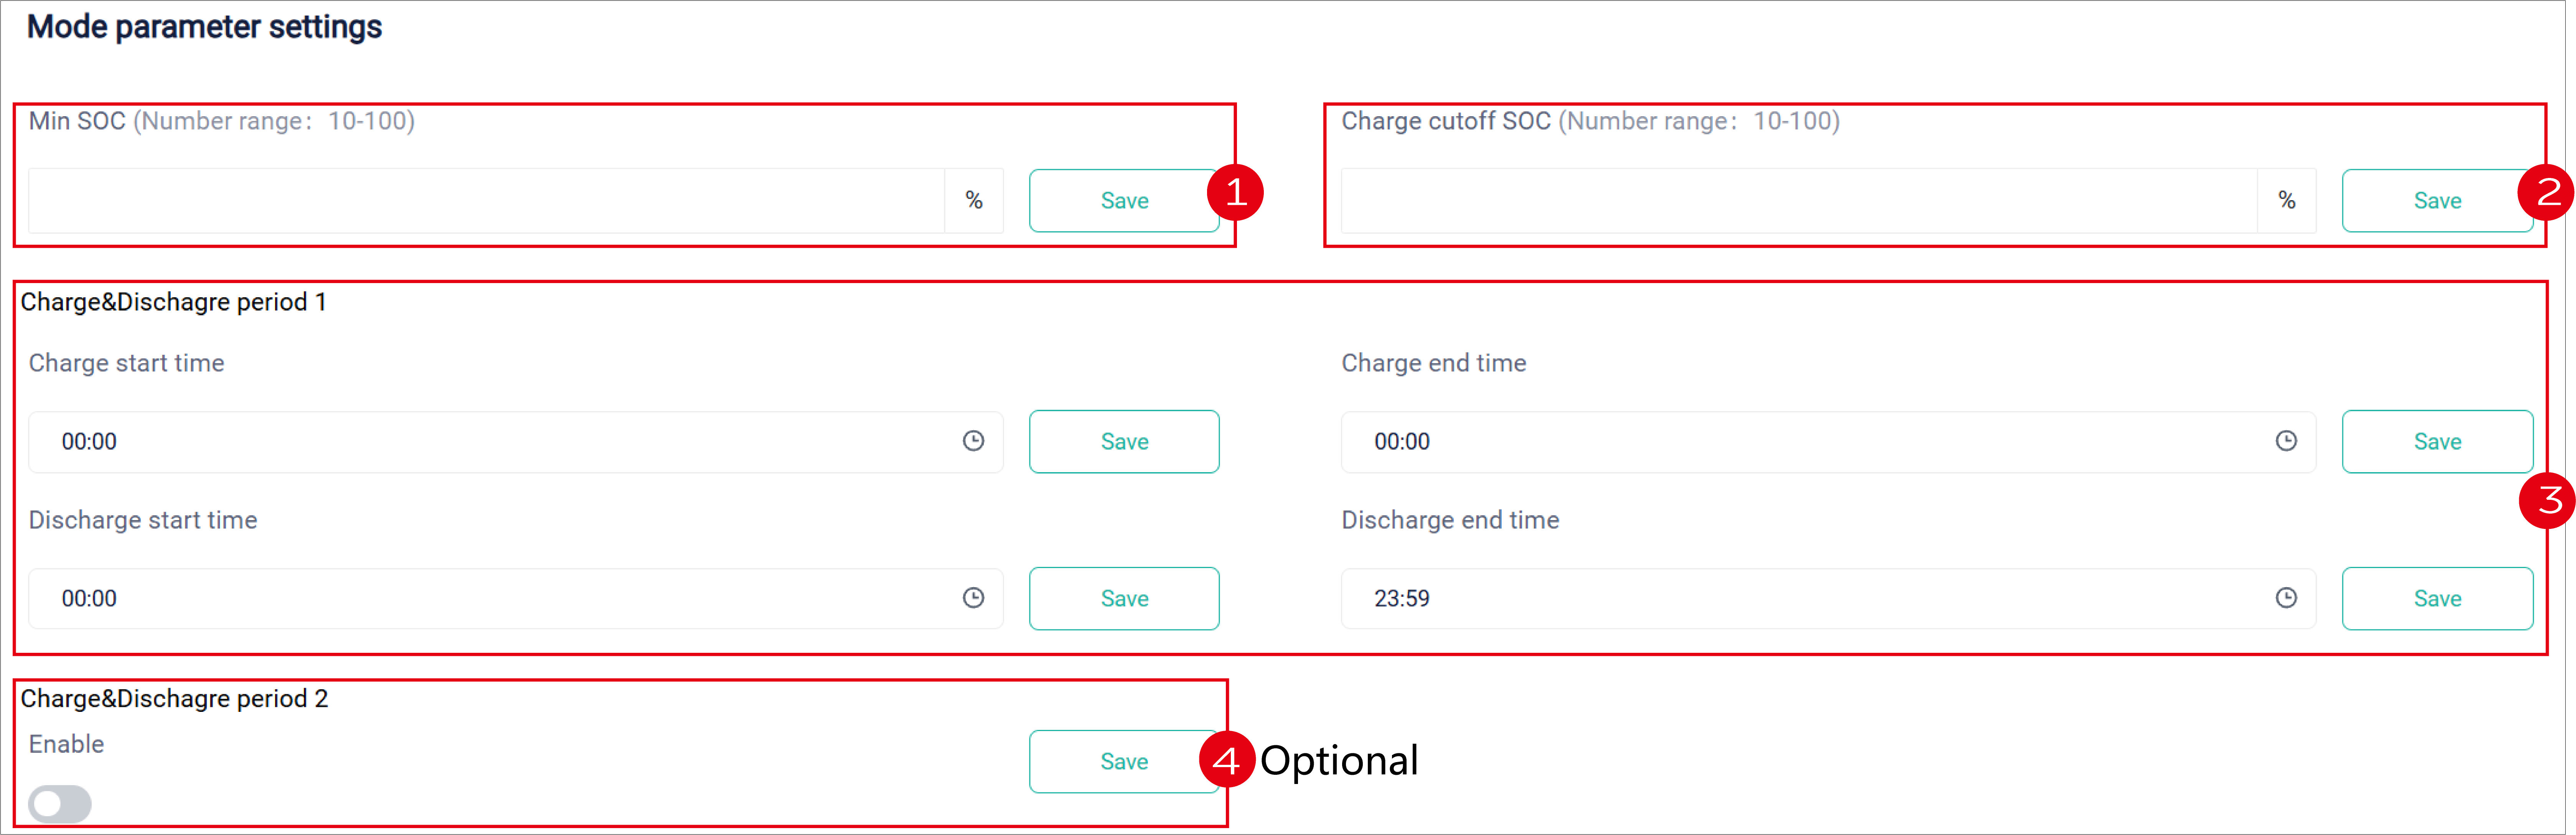
Method: Select the to-be-controlled device, select Feedin Priority, and click Run. The following setting items will appear. Set as follows:
- Set the min SOC.
- Set the target SOC for charging.
- Set parameters for Charge&Discharge period 1.
- (Optional) Enable Charge&Discharge period 2 and set parameters for it.
# Backup Mode
Backup mode is suitable for areas where power failure happens frequently. People living here should store enough energy to deal with this situation.
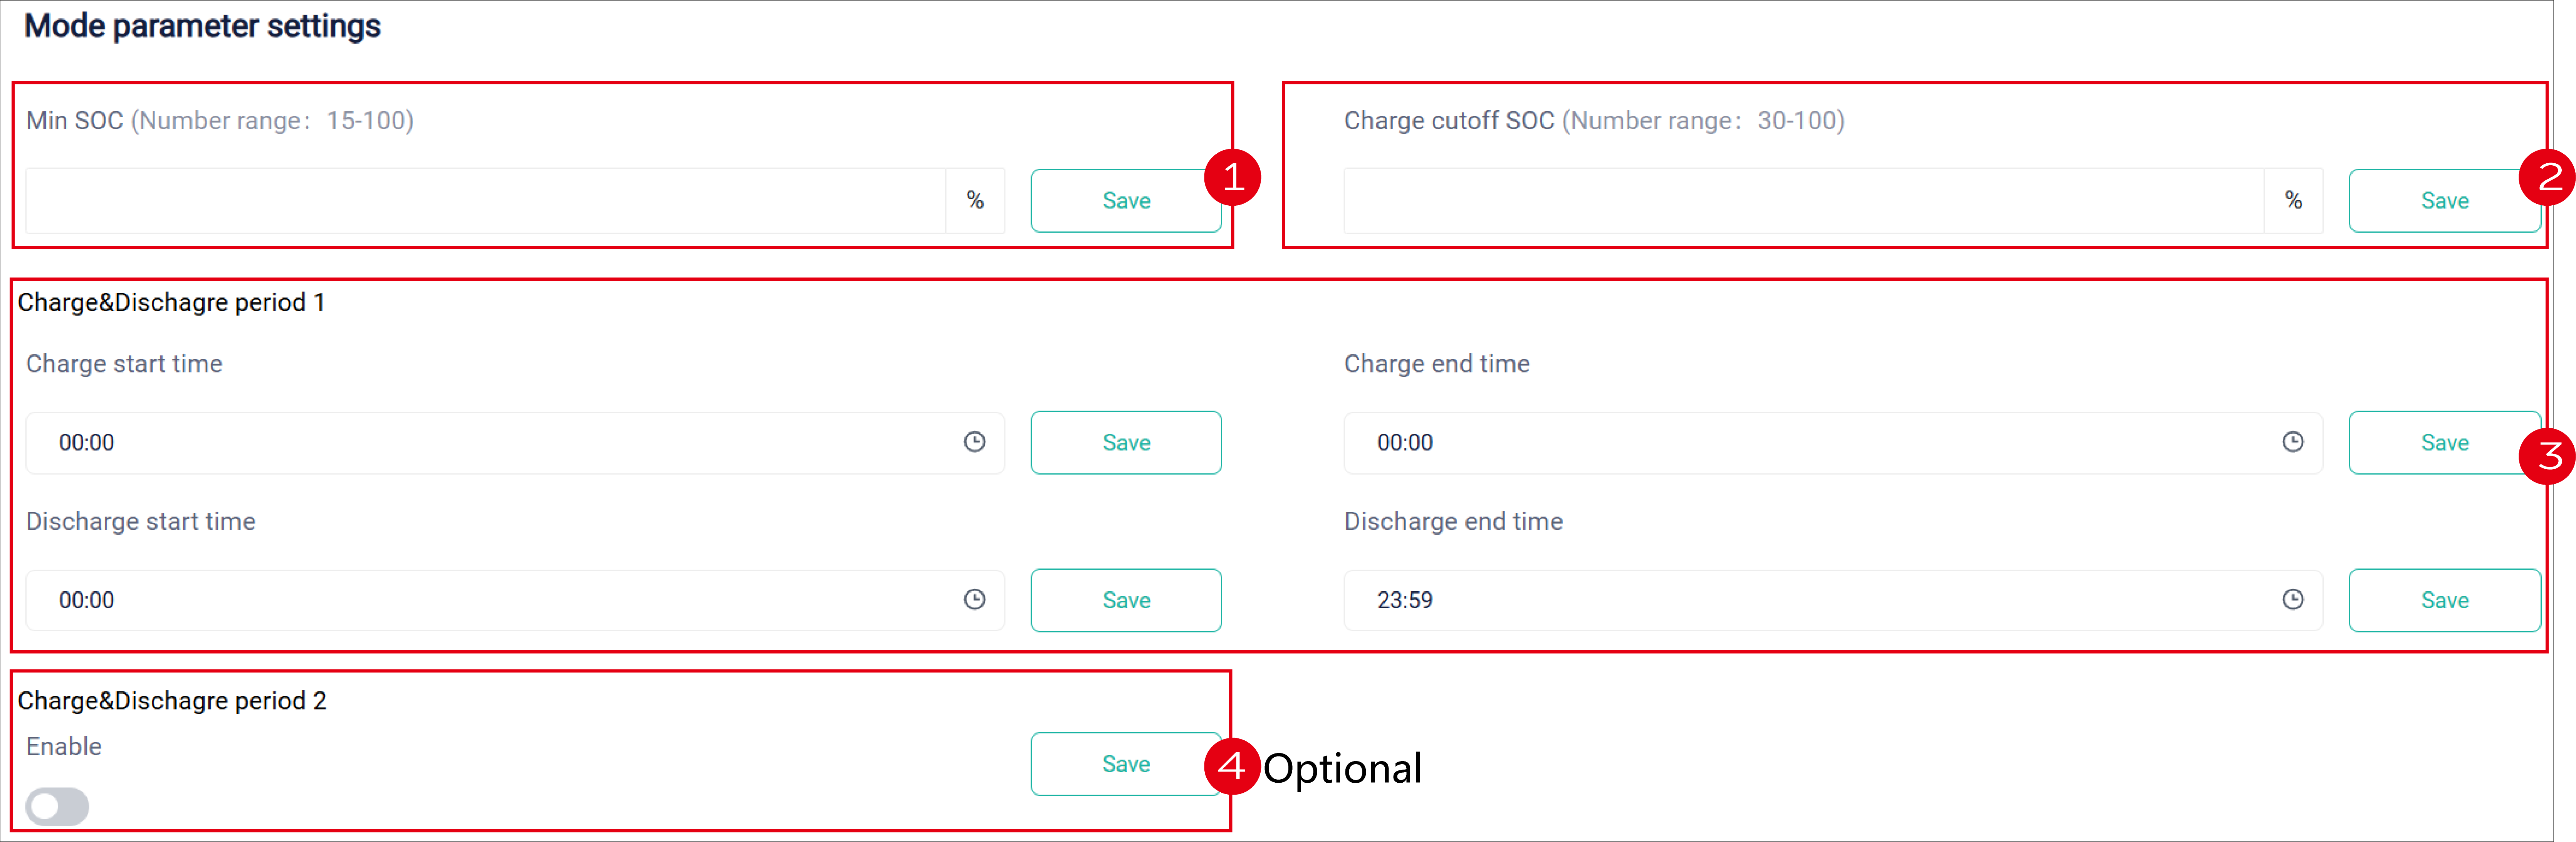
Method: Select the to-be-controlled device, select Backup mode, and click Run. The following setting items will appear. Set as follows:
- Set the min SOC.
- Set the target SOC for charging.
- Set parameters for Charge&Discharge period 1.
- (Optional) Enable Charge&Discharge period 2 and set parameters for it.
# Manual Mode
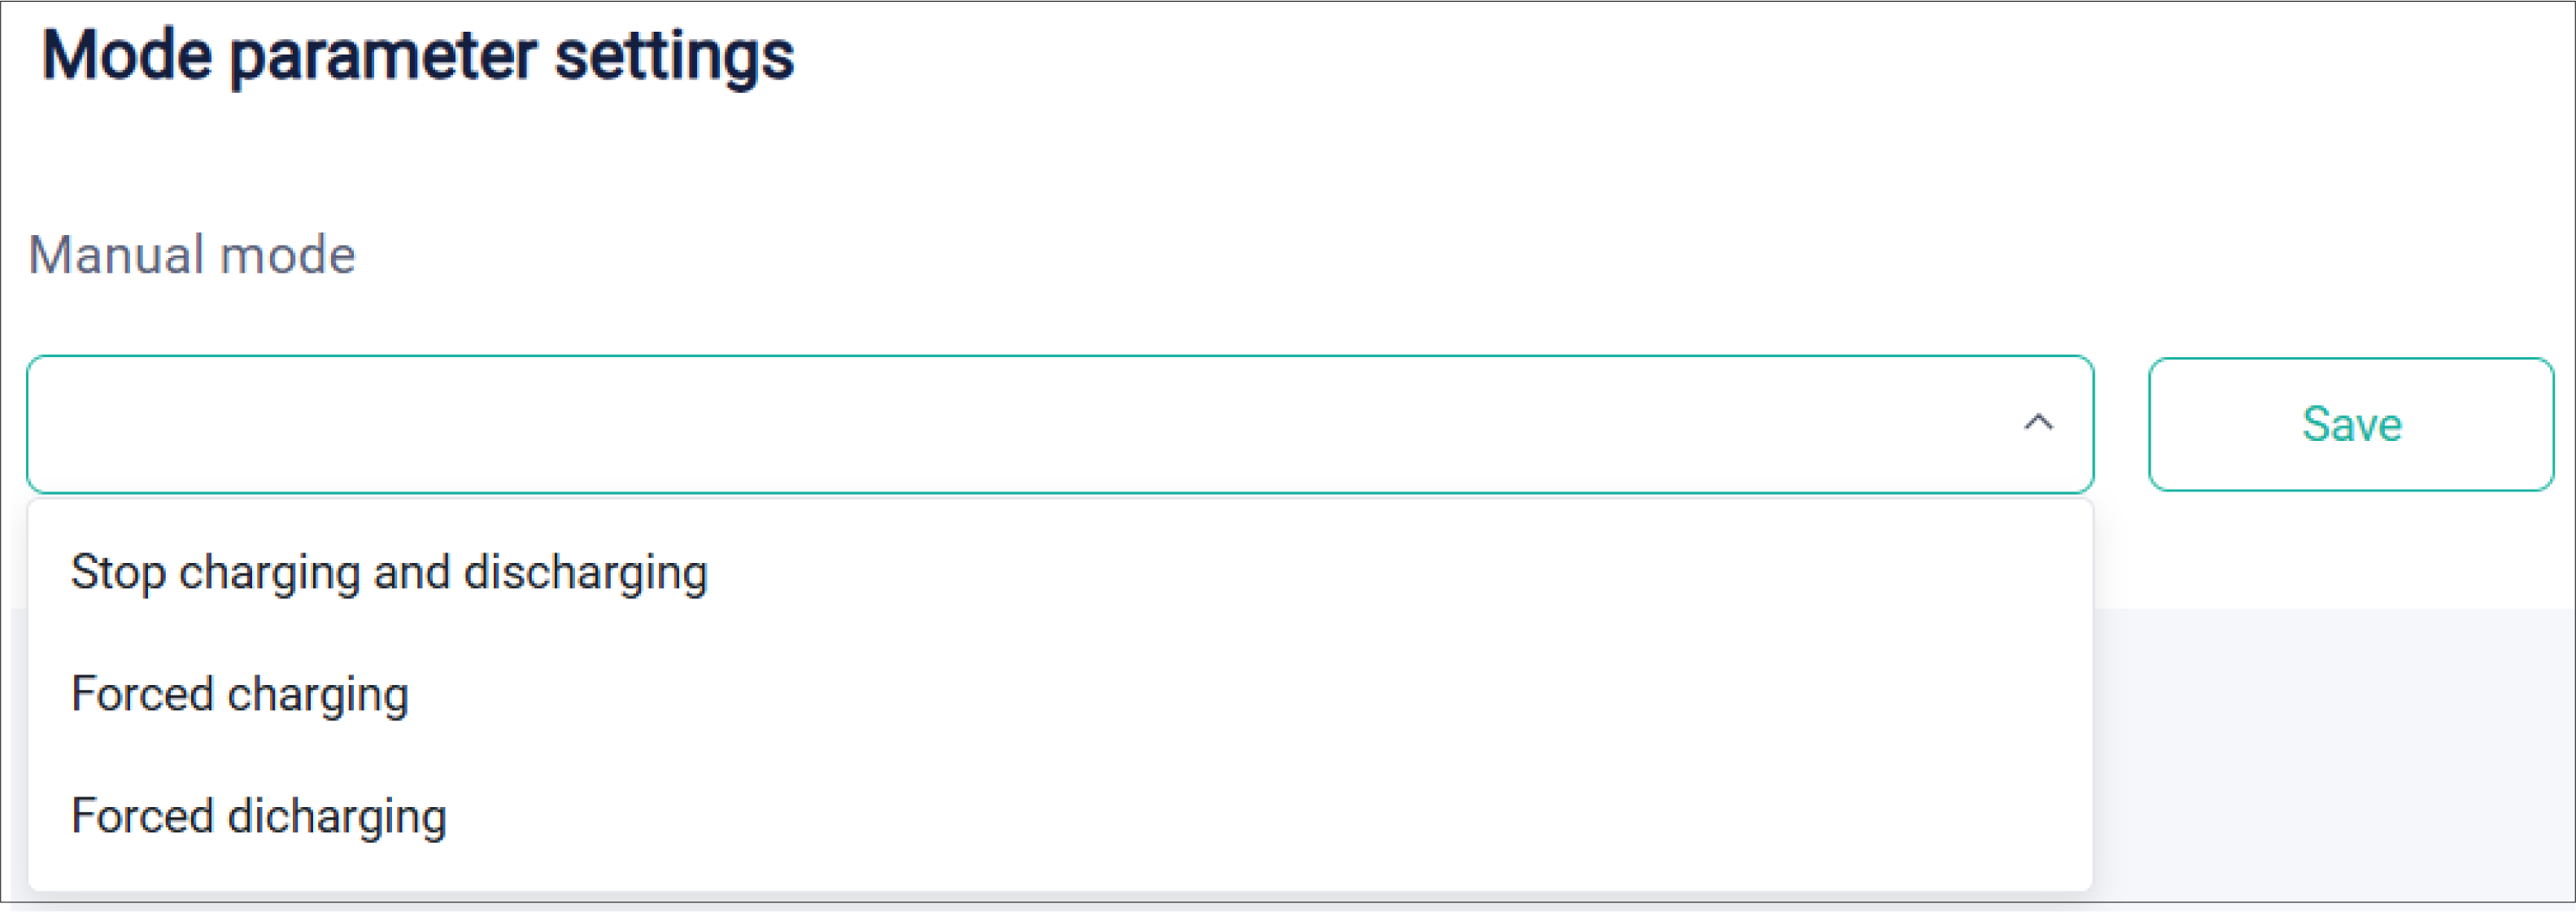
Manual mode is generally used for emergency situations. It is recommended that it should by operated by professional maintenance and debugging personnel. It includes: Stop charging and discharging, Forced charging, and Forced discharging. This mode will automatically exit after keeping running for 6h.
Method: Select the to-be-controlled device, select Manual mode, and click Run. The following setting items will appear. Set as follows:
# Peak-shaving Mode
Peak-shaving mode is applicable to users in countries which adopts the peak-shaving method to adjust the electricity consumption intelligently.
Method: Select the to-be-controlled device, select Peak-shaving, and click Run. The following setting items will appear. Set as follows:
- Set parameters for Discharge Period 1. By default, the shaving start and end time are 7:00 and 15:00 respectively.
- Set parameters for Discharge Period 2. By default, the shaving start and end time are 19:00 and 23:00 respectively.
- Set to take power from the grid. It works before Discharge Period 1, after Discharge Period 2.
- Set the reserved battery SOC.
# TOU Mode
In TOU, you can set different work modes for different periods in a day.
Method: Select the to-be-controlled device, select TOU, and click Run. The following setting items will appear. To set TOU, you need to configure template and strategy first.
Configuring Template:
- Select Template Configuration.
- Click "+" to create a new template.
- Enter a template name and set the minimum battery SOC. Divide a day (24h) into different periods, and select the inverter operation mode (charge, discharge, self-use, battery off, peak shaving) for each period. The minimum interval is 0.5h.
- Click Confirm to complete template creation.
Configuring Strategy:

- Select Strategy Configuration.
- Click "+" to create a new strategy.
- Enter the strategy name, select a template that has been created, set the priority, select a cycle mode, and set the start and end time of the policy strategy.
- Click Confirm to complete strategy configuration.
[!Note]
- Only one priority level can be selected for one template. Different templates cannot be selected at the same level.
- If you select Weekly Cycle, you need to further set which days of the week are required to cycle.
After completing the above configuration, click Start to run TOU mode.