# Plant
This section introduces plant-related operations: search for plant, add plant, view plant details, edit plant, and edit plant.
On the homepage, select Plant from the bottom navigation bar, to go to the plant list page. This page shows all plants under the current account.
Search for plant: In the search box, search for a plant or an EMS by entering a plant name or device SN (for EMS only). Besides, you can also set the filtering conditions by tapping the filter icon on the right side.
View plant details: Tap a plant card, to enter its details page. For detailed introduction, see Single-plant Details in the left navigation bar of this document.
Edit or delete plant: After entering the plant details page by tapping a to-be-edited or to-be-deleted plant, select Plant information in the upper right corner of the page, to go to the Plant information page. On the page, touch  to edit the plant. Or touch Delete to delete the plant. It should be noted that a plant that has been bound with a physical device cannot be deleted.
Add plant: Tap  in the upper right corner of the plant page, to create a plant. For details about creation steps, see below.
Steps for creating a plant:
Step 1: Fill in the basic plant information. Set whether to authorize the installer or distributor to maintain this plant.
[Note]
- Service provider refers to distributor or installer. After providing the number of service provider and authorizing the maintenance right to it, the service provider will receive an authorization notification. Once accepting the authorization, it can maintain your plant remotely.
- PV capacity is the sum of the capacity of all PV panels installed.
- Battery capacity is the the sum of the capacity of all batteries installed.
Step 2: Select the proper method to add a device.
- Bluetooth (Support Pocket Wi-Fi+LAN 2.0 only): Enable the Bluetooth permission. The system will automatically search for the device. After the system found the device, tap to add it.
- Manually add (Applicable to all devices): Select the proper device type according to the device you hold, and then scan to enter or directly manually enter the device registration number.
- Scan (Applicable to all devices): Tap the icon
 in the upper right corner, to scan to enter or directly manually enter the device registration number.
Steps 3 and 4 below are only applicable to user who select Wi-Fi or 4G as the communication method as well as who use Pocket Wi-Fi+LAN 2.0. Note that the Pocket 4G user does not need to configure 4G as configuration data has been burned into the pocket. You can directly skip from this step to Step 5.
Step 3: Configure Wi-Fi, 4G, or LAN. Note that LAN configuration is only required for Pocket Wi-Fi+LAN 2.0 users who select LAN as the communication method.
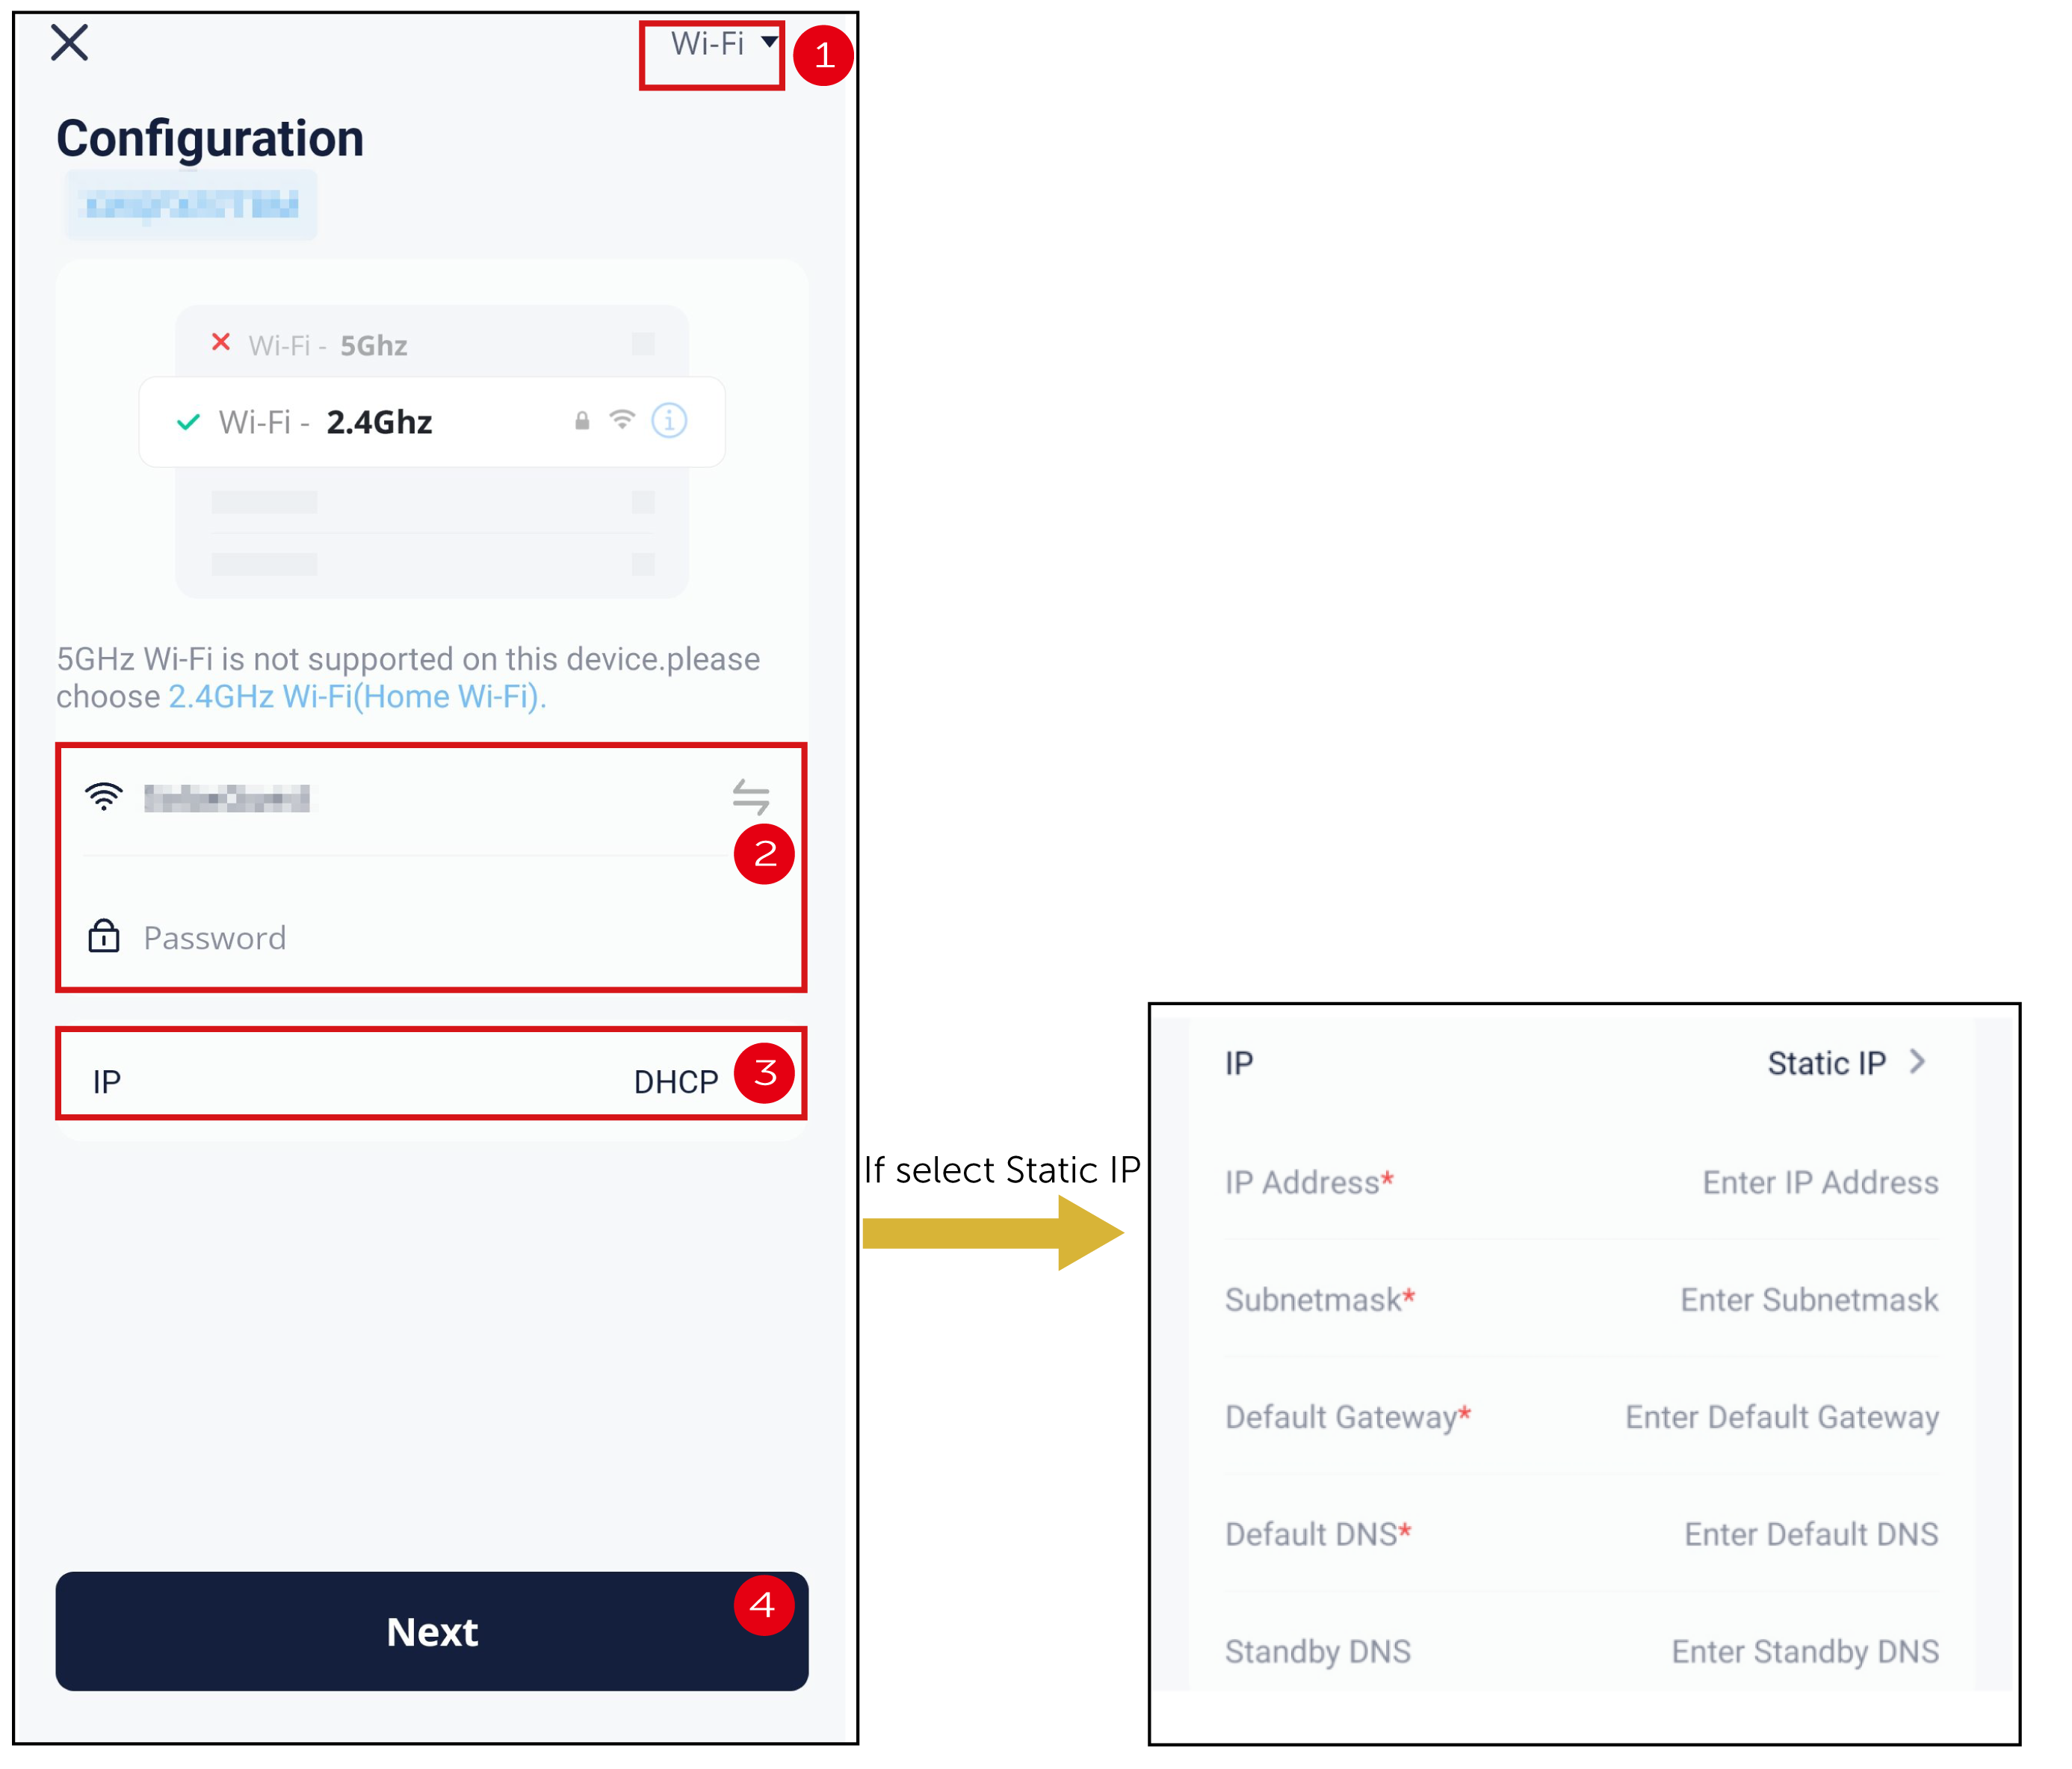
- Configure Wi-Fi
- Select Wi-Fi as the communication method (For Pocket Wi-Fi+4G only. Pocket Wi-Fi not required).
- Select an available Wi-Fi and enter the corresponding password.
- Select the IP address assignment method.
- If you select DHCP, no additional configuration is required.
- If you select Static IP, you need to enter the network parameters manually, for example IP address, subnet mask, gateway, and DNS. You can search the Internet for the method for acquiring these parameters.
- Tap Next.
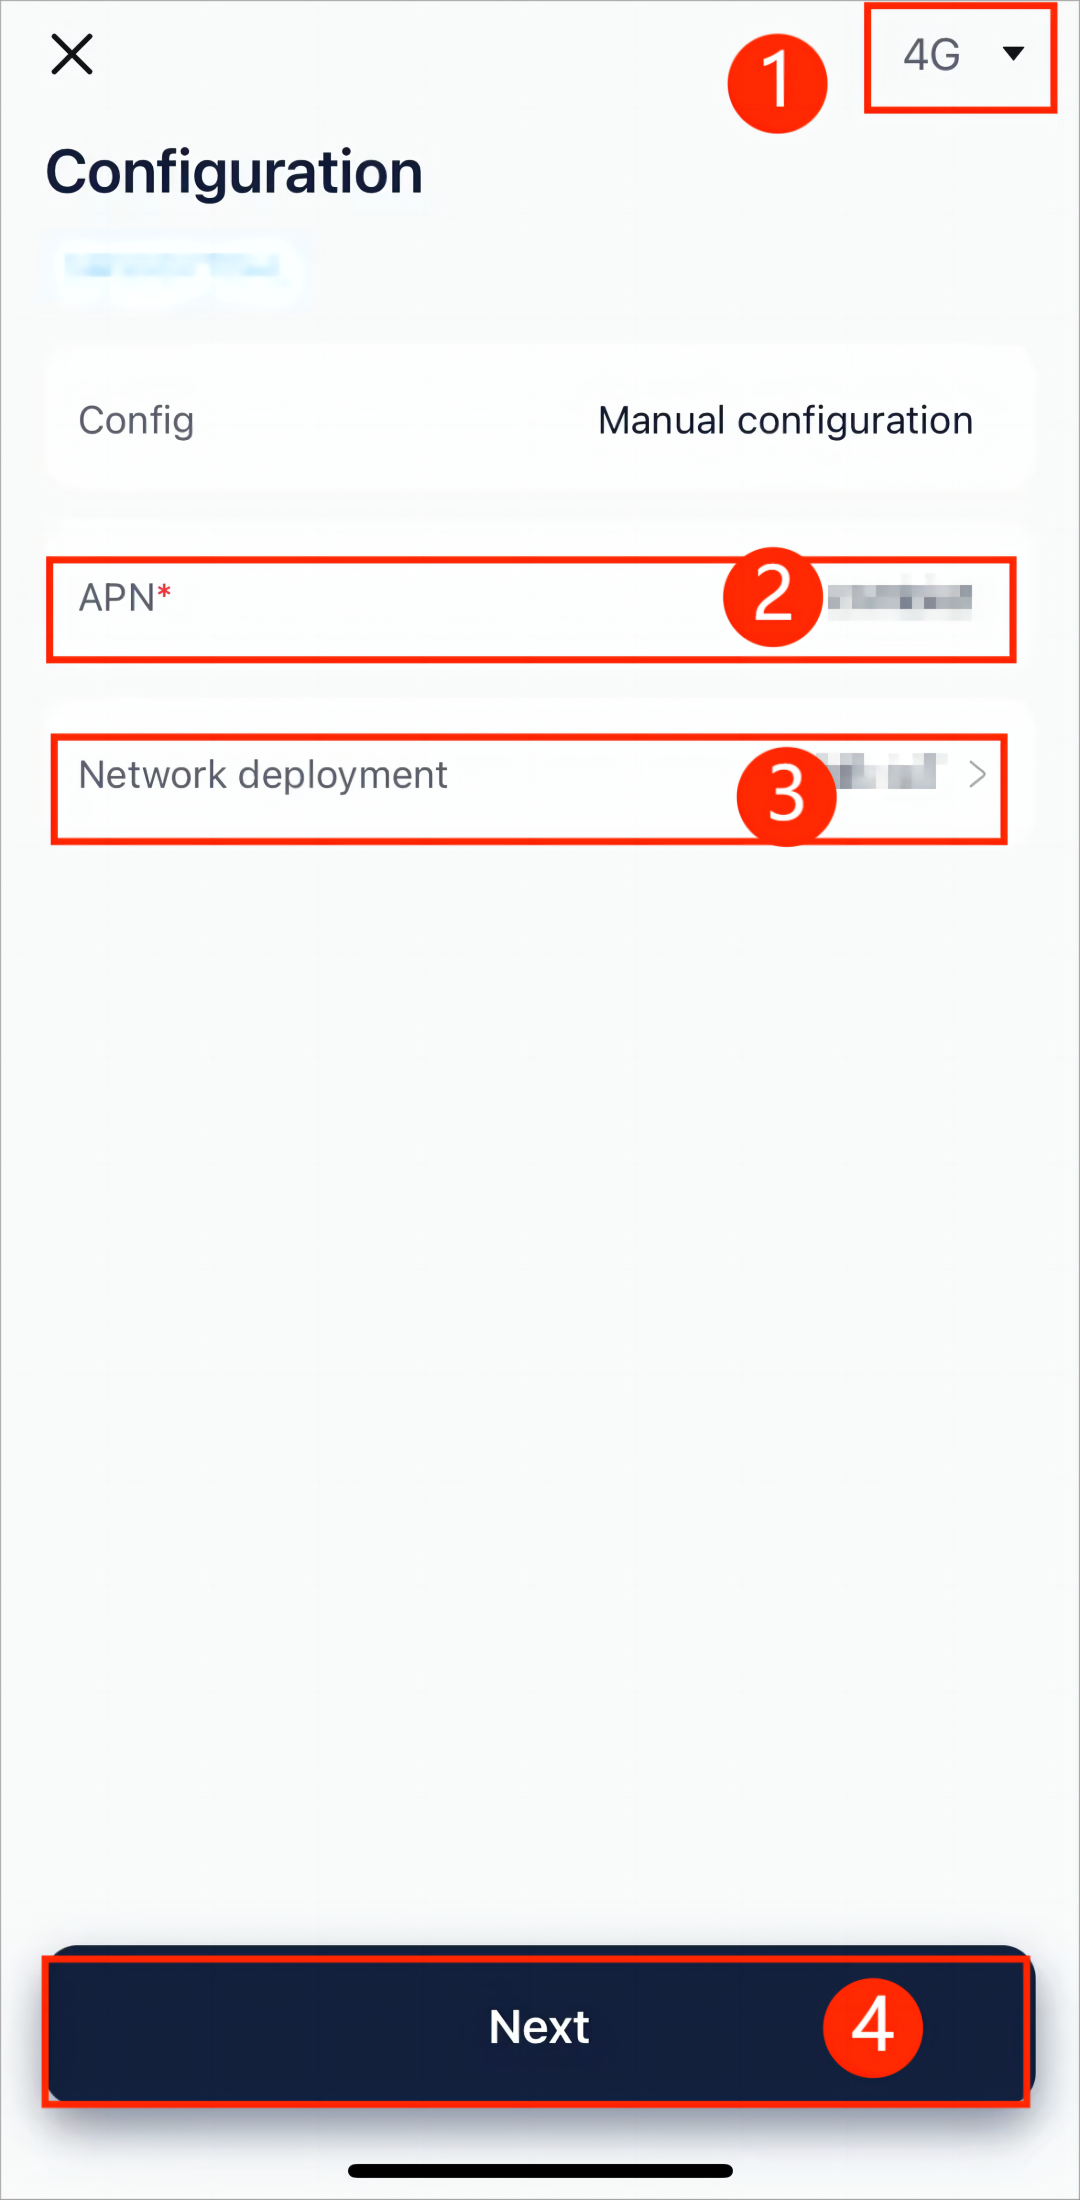
Configure 4G
- Select 4G as the communication method.
- Enter the APN (acquire it from the operator).
- Select the network deployment (acquire it from the operator).
- Tap Next.
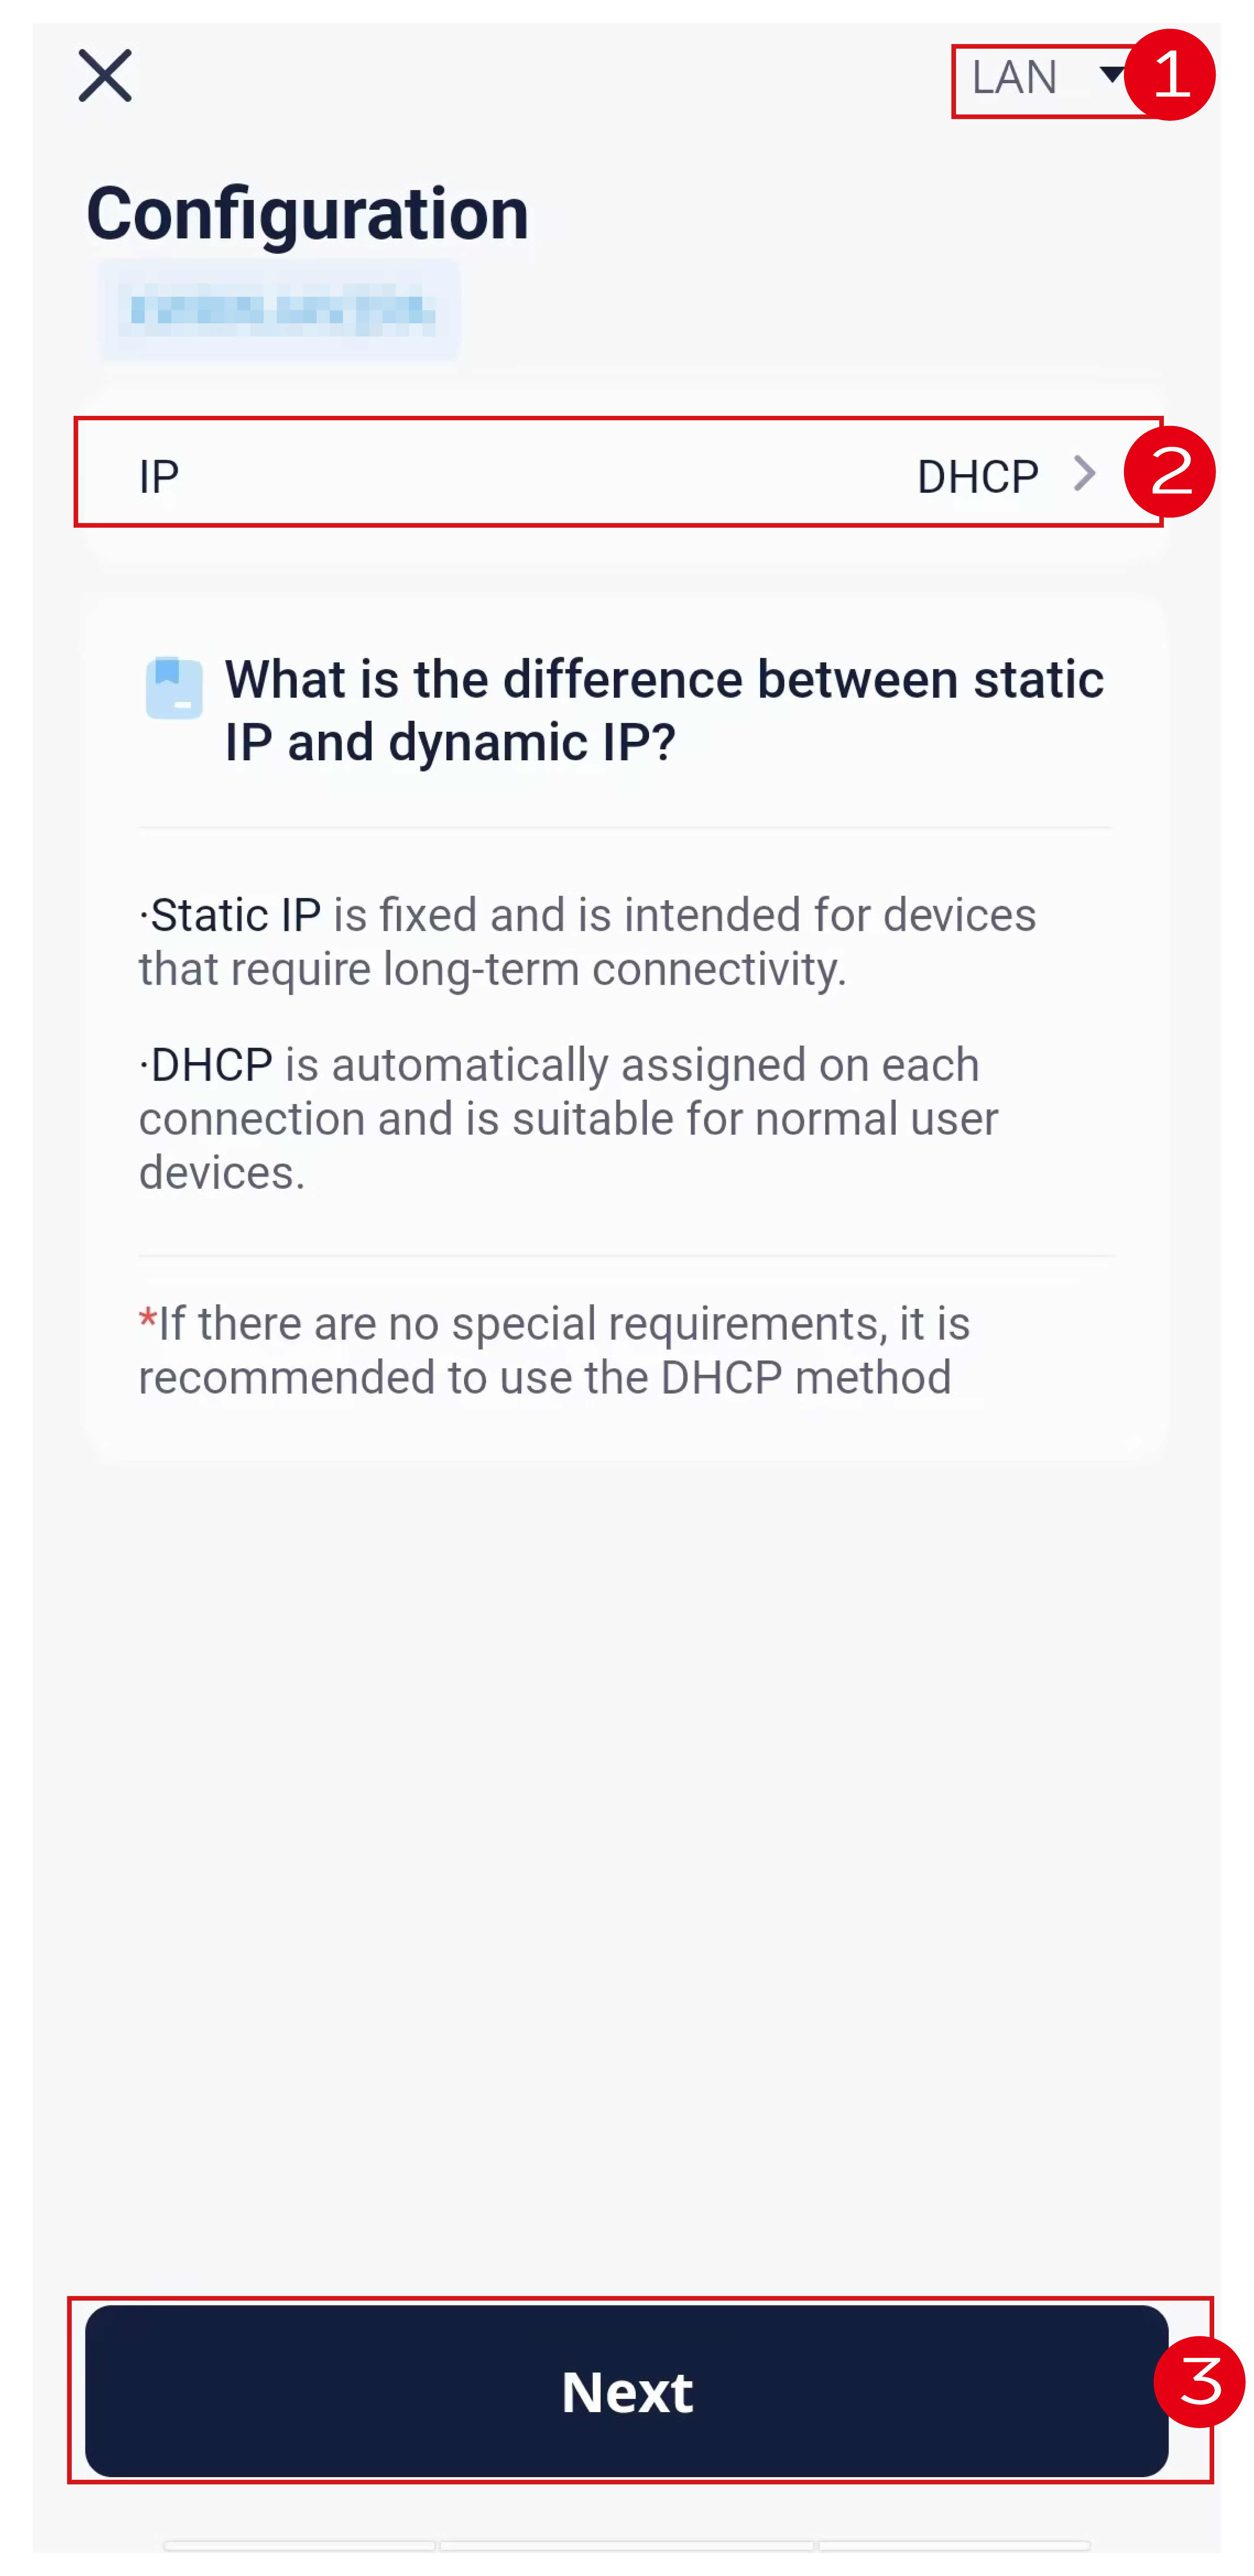
Configure LAN
- Select LAN as the communication method.
- Select the IP address assignment method.
- Tap Next.
[Note] Pocket Wi-Fi+LAN 2.0 users as well as users whose phone brand is NOT vivo, HUAWEI, and OPPO can directly skip from this step to Step 5.
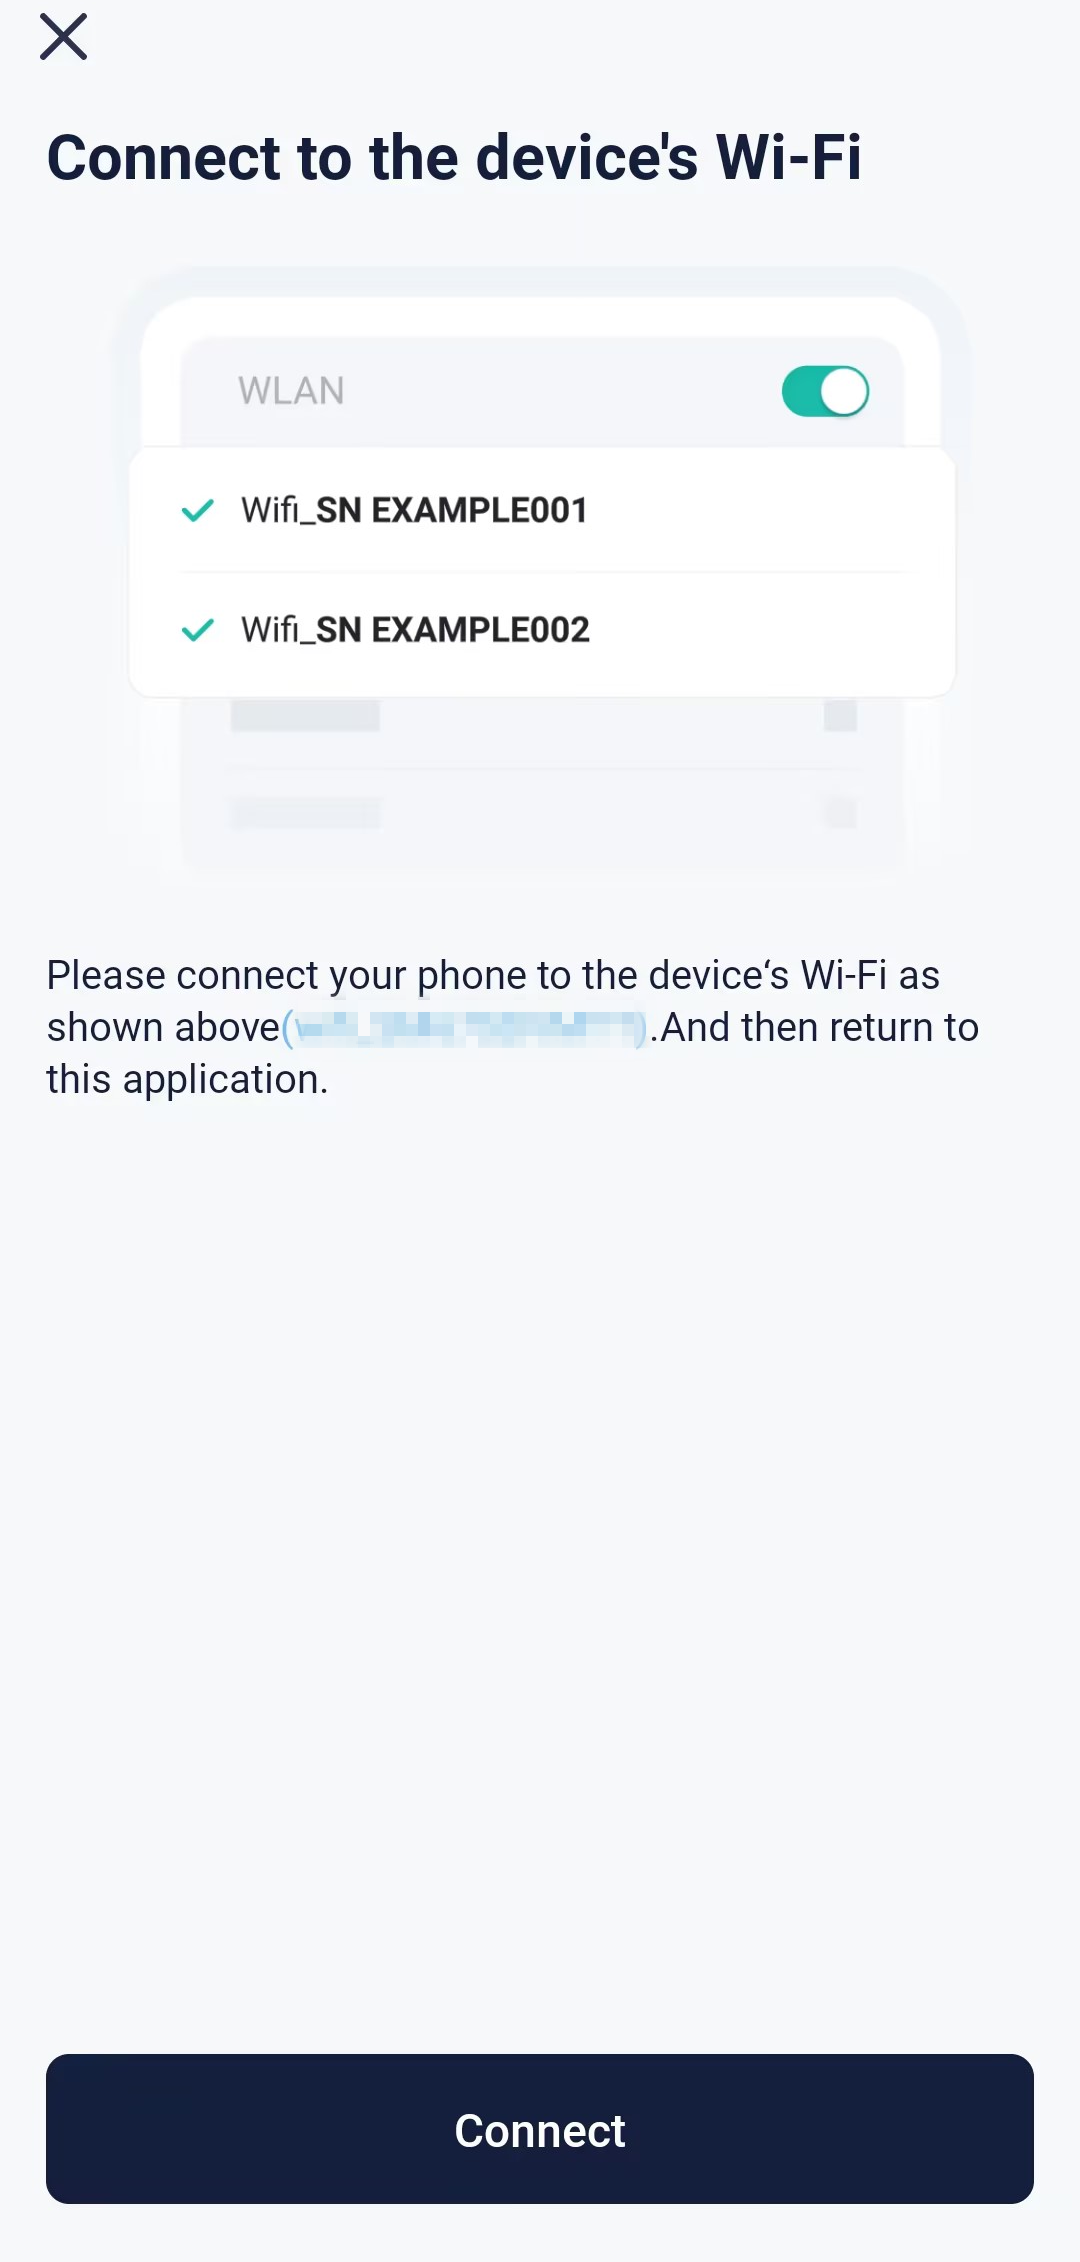
Step 4: Tap Connect and switch the phone WLAN to the device hotspot. The hotspot name is: Wifi_device SN. After that, return to the SolaXCloud App.
Step 5: Wait for the device to connect to the SolaXCloud until all items turn into  , which indicates that the device connects to the SolaXCloud successfully. Tap Finish.
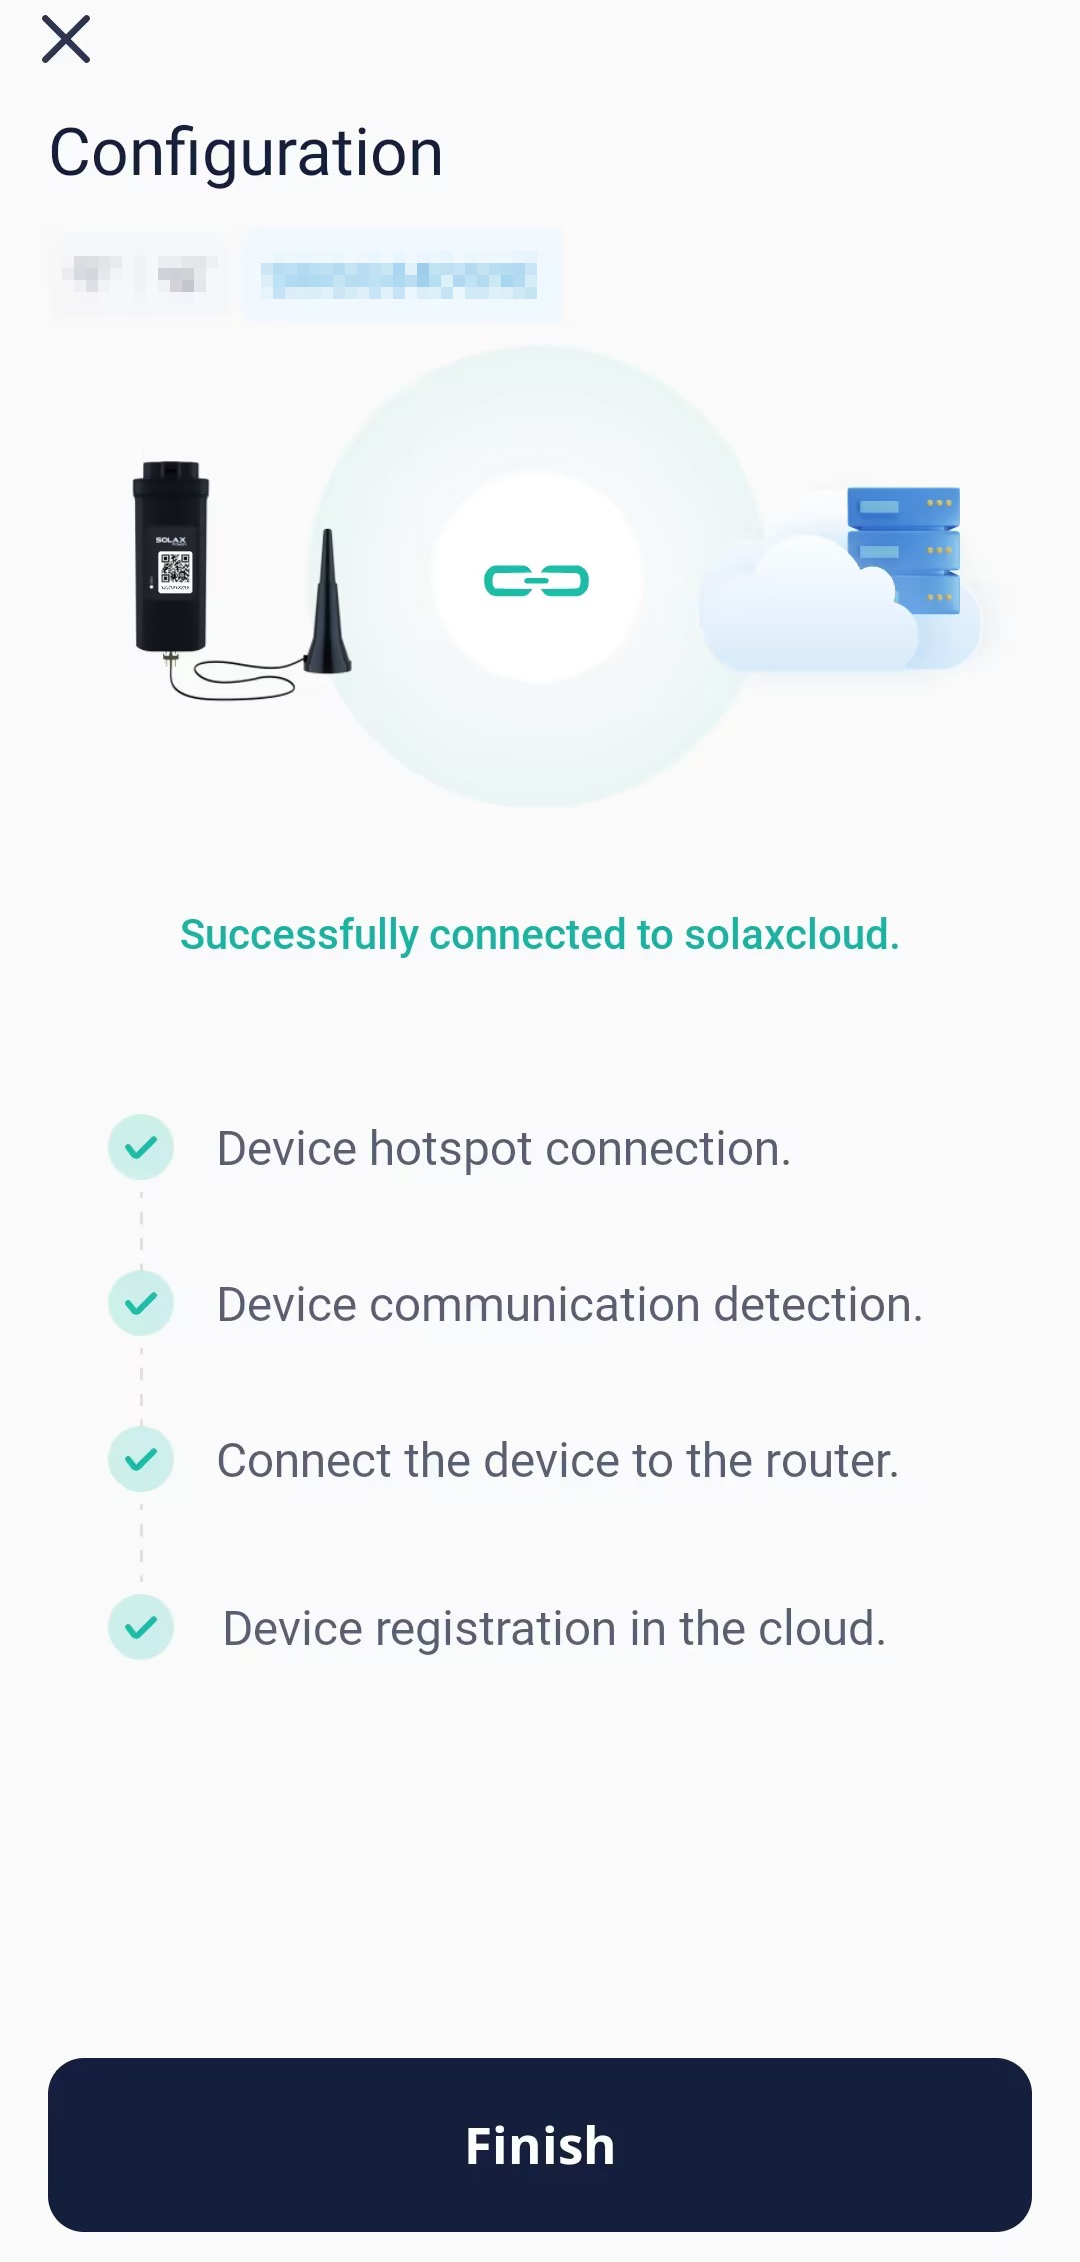
[!Note] If you failed in this step, adopt the proper solution according to the provided error code and suggestions.
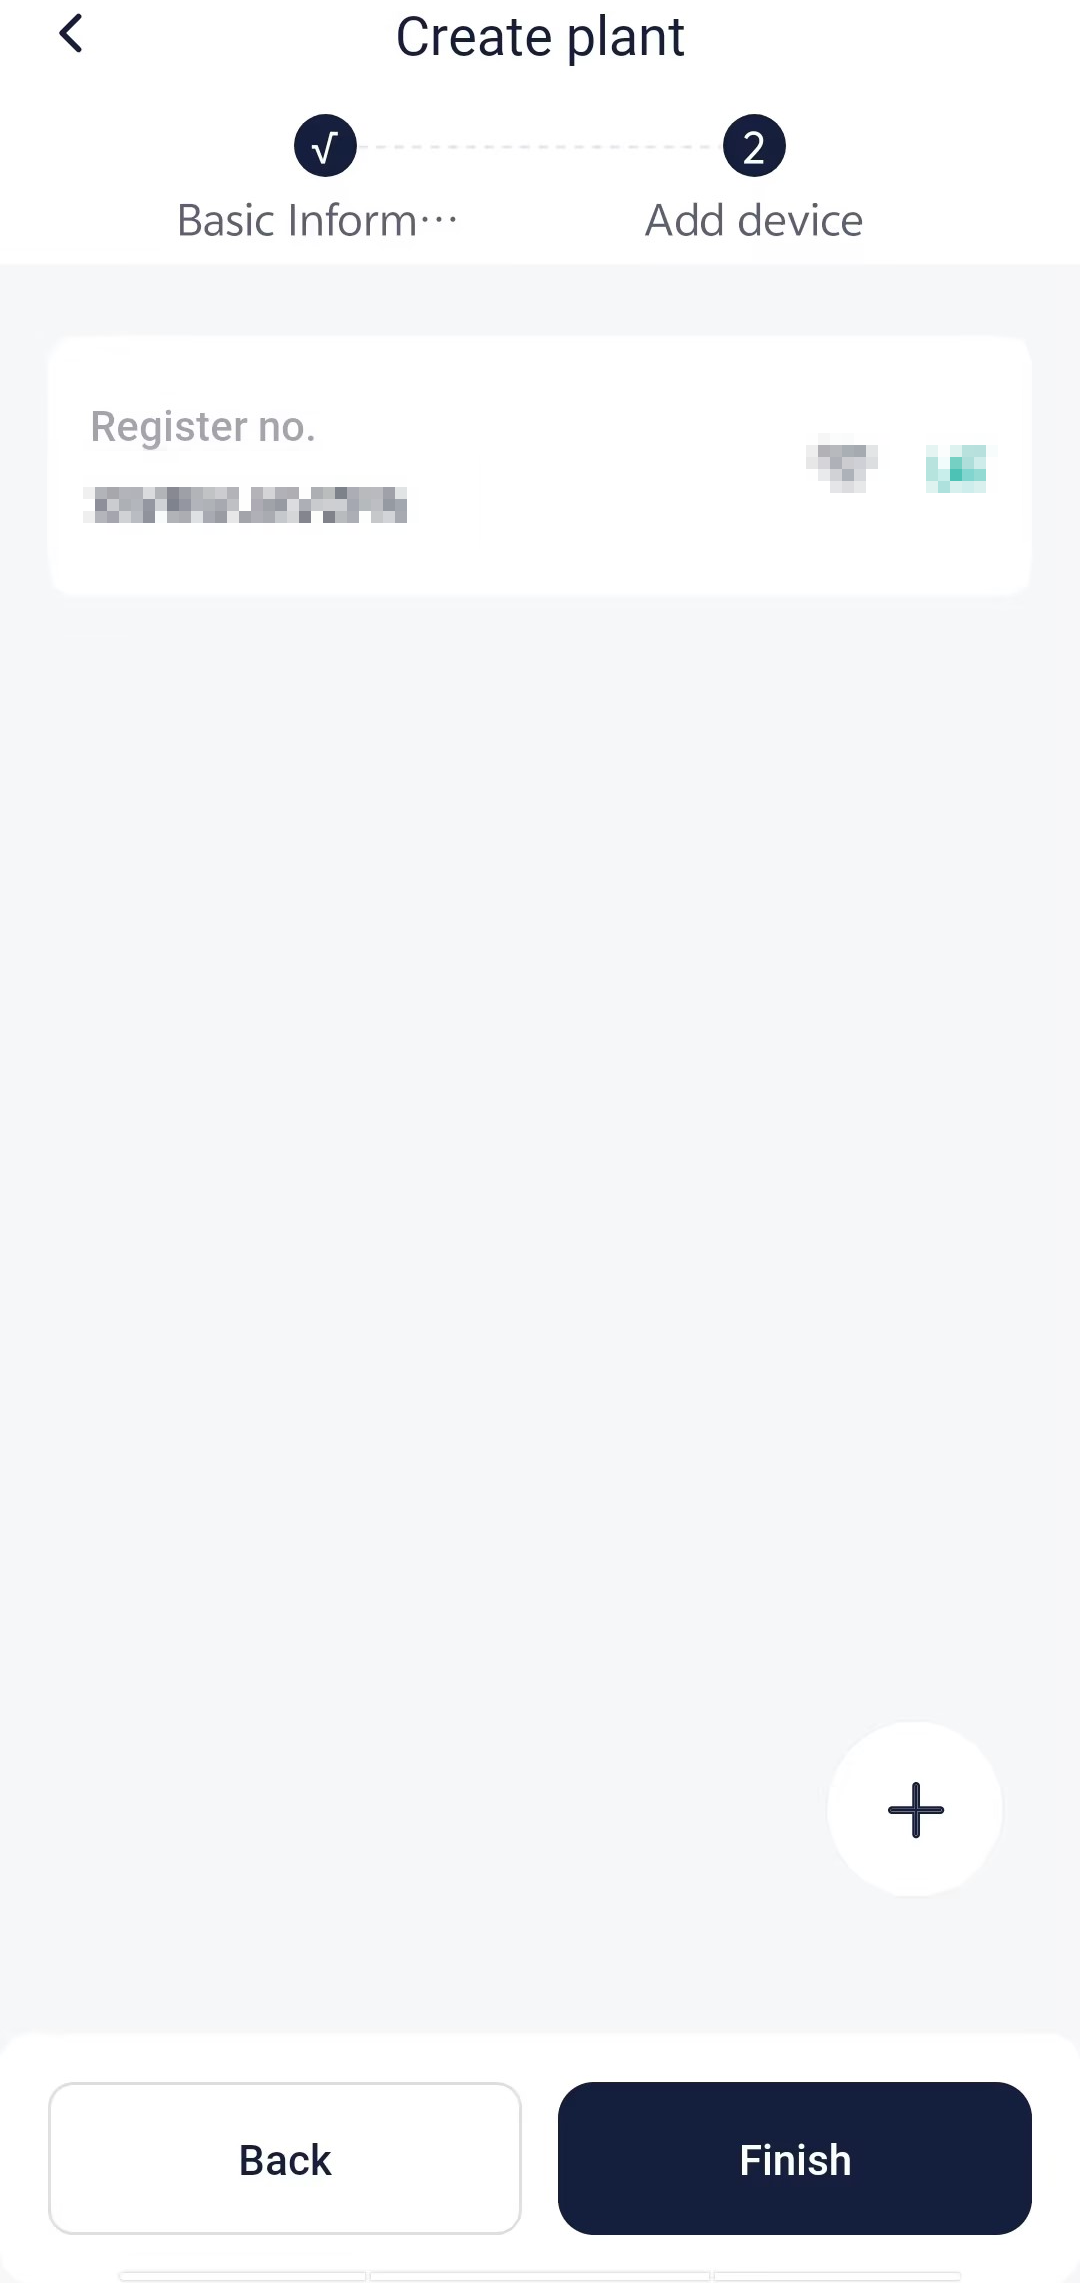
Step 6: Confirm the already added device after returning to the add-plant procedure page, and tap Finish, to complete plant creation. You can find the plant in the plant list.
Step 7 (Applicable to all devices except Pocket Wi-Fi+LAN 2.0): Tap Go Check, to ensure that the phone WLAN has been switched to the family Wi-Fi. After switchover, return to this App and tap Got it.